I saw that ugocapeto3d had mentioned MiDaS v 3.1 recently which is a AI monocular depth estimation tool. It creates depth maps using a single 2D image which is pretty amazing. I have used a previous version of this tool in the past which I mentioned in an older dev diary post.
I won’t go into how to use the tool because I think ugocapeto3d does a great job of doing that already and I followed the steps in his video about it when I did it myself. You can also find the link to the resource in his video description.
There are a variety of uses for depth maps in VFX for video and image editing tasks that I am aware of and probably several I’m not, but in this article I will tell you what particular use case I would personally find this useful for in the context of image editing.
AI techniques for creating depth maps may save you some time, but you can make them manually if you want to. It is useful knowing how to make and edit them because the AI although it is improving, it might not get everything right. Also depends on the style of image you are working on. If it isn’t recognizable to the AI it might not work well because photography subjects are the main target use case.
Adding Depth of Field and Fog effects to an image
I used Affinity Photo to add depth of field and fog to an image once I had generated the depth map using the MiDaS 3.1 Google collab notebook mentioned in the video.
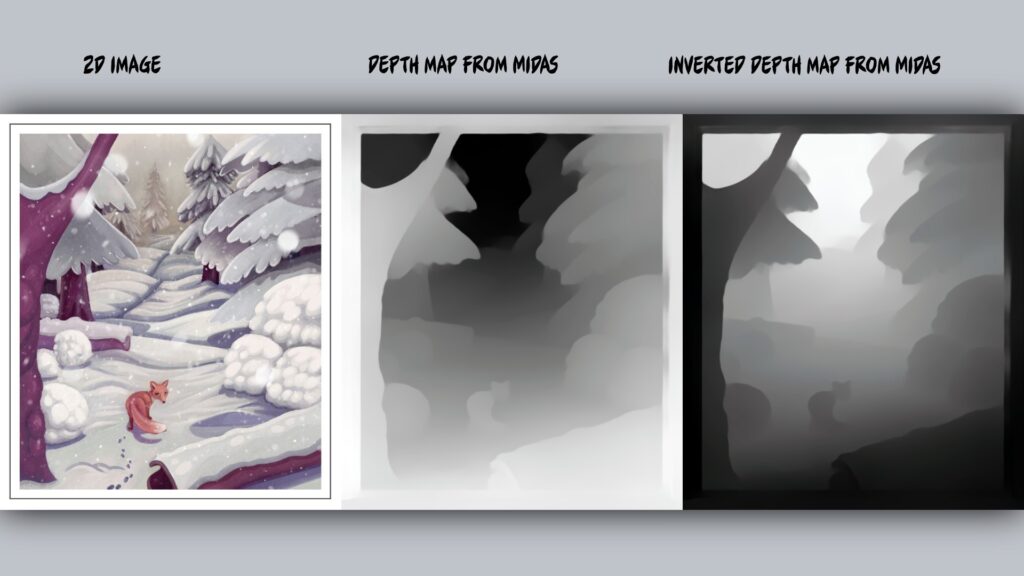
Here is the 2D image I used and the resulting depth map. The depth map is pretty good in this case, although I could have edited the top left hand area for the trees in the background. I decided for this example it was not really worth it.
It is worth noting that for the fog and depth of field you may need to invert the depth map to get the effect you want (closer or further effect). I inverted the depth map in Affinity Photo to make the depth of field blur out the further away details of the image and put the fog in the background.
Affinity Photo image editing
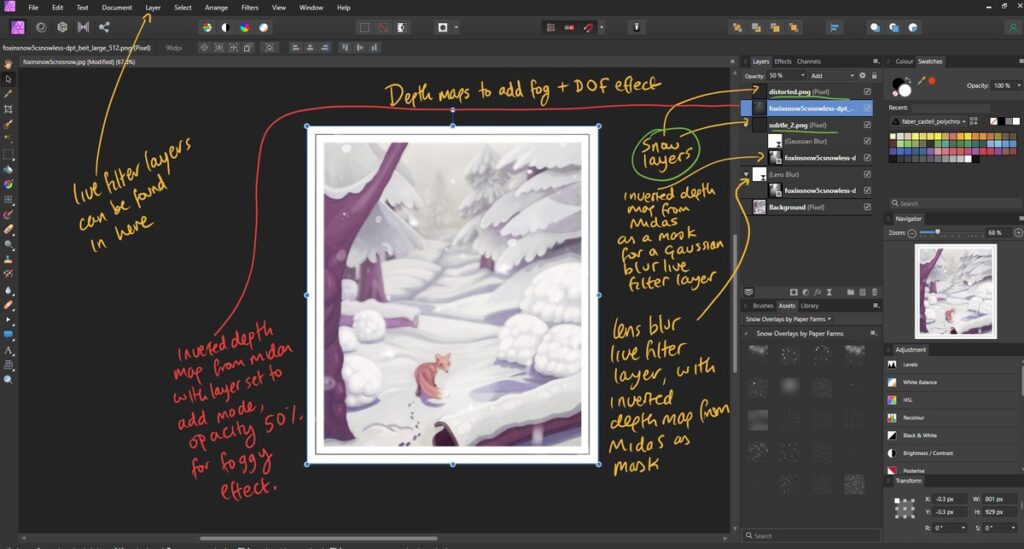
In Affinity I created the fog effect by using the inverted depth map above the fox image (a version without the falling snow) in “Add” layer mode with opacity at 50%.
I created the depth of field effect by using the “lens blur” live filter layer (radius set to 6.1) and set the inverted depth map as a layer mask for the live filter. This way the lens blur is masked out more toward the front of the image using the grayscale values of the depth map. If you wanted the blurring to be in the front of the image you wouldn’t need to invert it. The focal point is the fox so I thought this would make more sense in this case.
I suppose the limitations of this in Affinity Photo are that the blurring can either be right at the back or right in front, if it was a 3D scene you would be able to have more control over the focal point of the DOF, but I have to work with the limitations of the software in this case.
If you are using Photoshop the lens blur filter is more advanced and lets you select a focal point on the depth map. This video I found by Dave Kelly might be interesting to you in that regard.
I also added some snow layers. The top snow layer I wanted to be sharper, but I added another and set a Gaussian blur with another depth map mask to see if that would knock it back a bit to create more depth to the snow flakes.
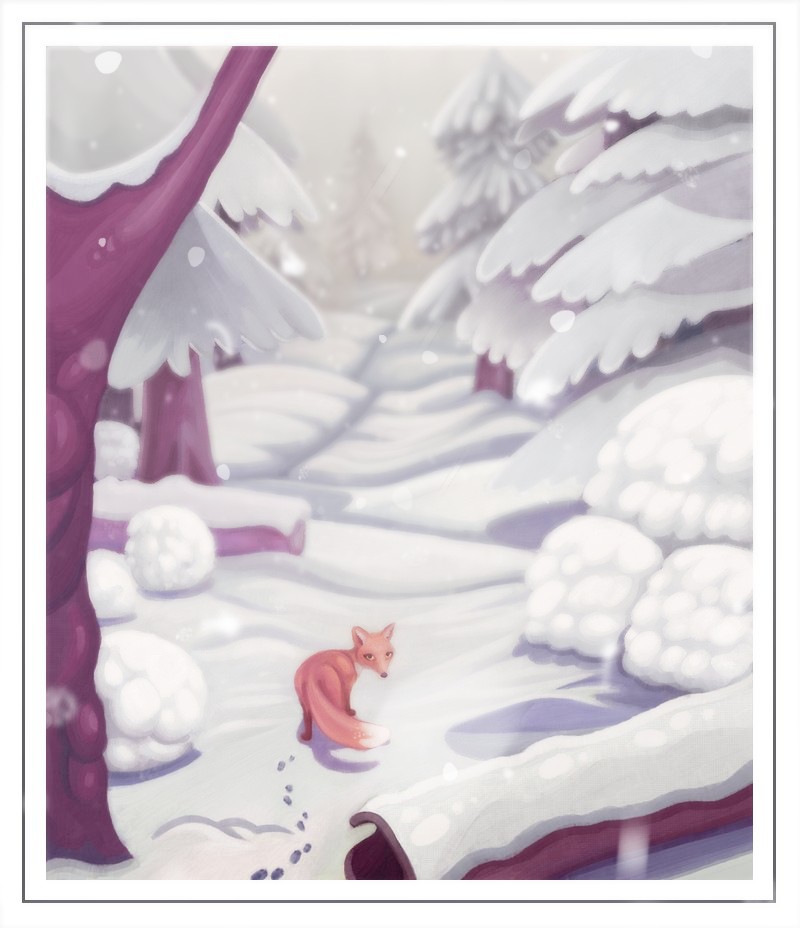
The resulting image:
Please help support my blog
Liberapay .
Buy me a coffee .
Kofi .
Payhip .
Gumroad
Source link

